How to Conduct Usability Testing That Drives Real Results

Great usability testing isn’t just about watching people use your product; it’s a structured investigation to find friction points and see if your design ideas actually work in the real world. This process boils down to a few core activities: setting clear goals, finding the right people to test with, writing realistic tasks for them to do, running the sessions well, and then turning all that feedback into changes that matter.
Building Your Usability Testing Foundation
Before you even think about scheduling your first session, you need to lay the groundwork. The success of your entire study rests on the strength of this foundation. I’ve seen teams jump into testing with a vague goal like "see if the app is easy to use," and they almost always come back with fuzzy, unactionable results. A solid test plan is what separates guesswork from a genuine, data-driven effort to make your product better.
Think of this stage as the strategic part. It’s less about the UI and more about defining exactly what you need to learn. Getting this right ensures every minute you spend with a participant is valuable.
Setting Crystal-Clear Objectives
First things first: you have to translate your broad business goals into specific, measurable test objectives. If you ask vague questions, you'll get vague answers. The trick is to frame questions that can be answered by simply observing a user.
For example, don't ask, "Is our checkout process good?" Instead, aim for something like, "Can a first-time user successfully buy a single item using a credit card in under three minutes?"
This simple rephrasing forces you to get specific about:
- The User: A first-time user.
- The Task: Purchase a single item.
- The Success Metric: Completing the purchase in under three minutes.
This level of detail keeps your test focused and makes your findings hard to argue with.
Defining Your Target User Personas
The insights you gather are only as good as the people you recruit. If you're testing a complex financial tool with college students, you're going to get very different—and probably useless—feedback compared to testing it with seasoned accountants. That's why defining your target user personas is an absolute must.
Go deeper than just basic demographics. You need to consider their mindset, their comfort level with technology, and what motivates them. Are you looking for "Power User Paula," who lives and breathes this kind of software, or "Newbie Nate," who's seeing it for the very first time? Each one will approach your product from a completely different angle, and your test plan needs to reflect that.
A well-defined persona is your North Star for recruitment. It ensures you’re not just testing with any users, but with the right users whose feedback directly reflects the experience of your target audience.
This process lays out the critical first steps: nail down what you want to learn, figure out who you need to learn from, and decide how you'll measure success.
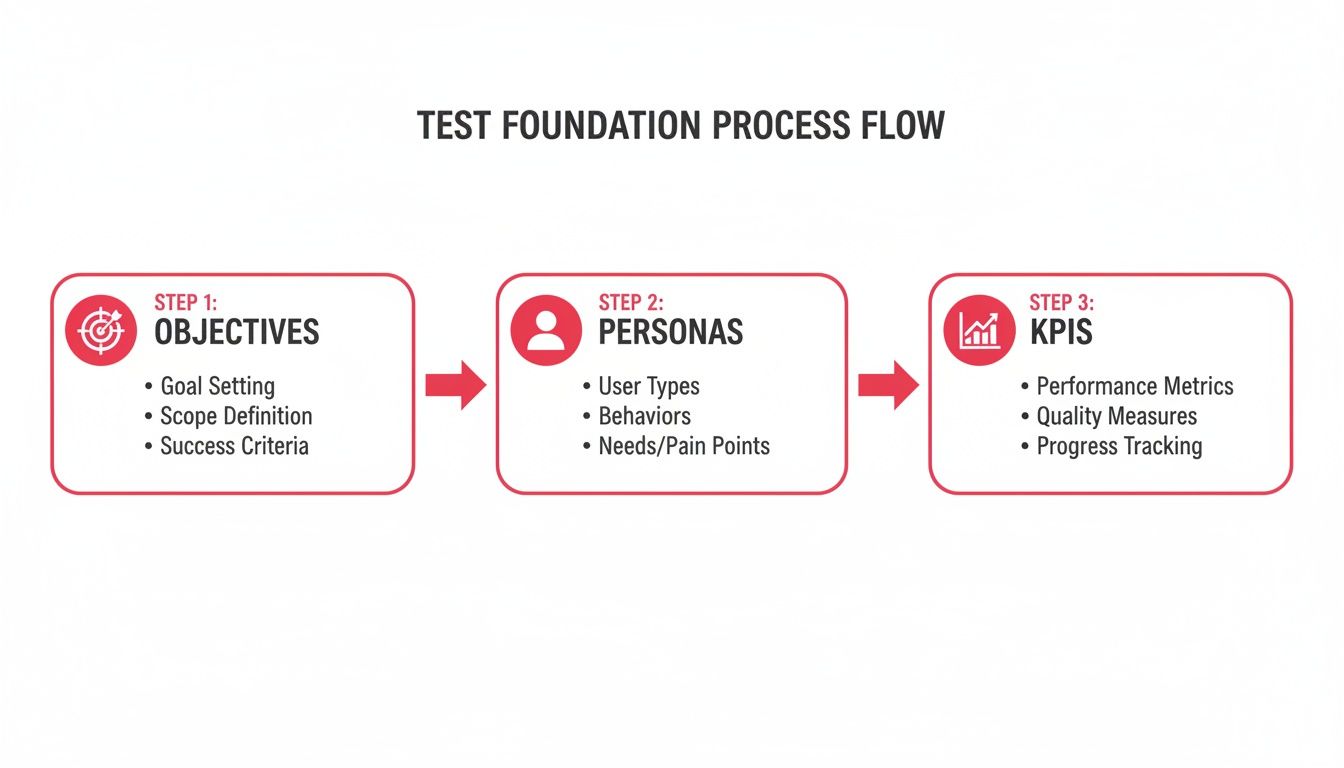
This flow shows how each piece builds on the last, creating a sturdy framework for your entire study.
Establishing Your Key Performance Indicators
With your objectives and personas locked in, the final piece of the foundation is defining your key performance indicators (KPIs). These are the hard numbers that tell you, objectively, whether users are succeeding or struggling.
Some of the most common usability KPIs I rely on are:
- Task Success Rate: What percentage of users actually completed the task?
- Time on Task: How long did it take them, on average?
- Error Rate: How many mistakes did people make along the way?
- User Satisfaction: This is often measured with a quick post-test survey, like the System Usability Scale (SUS).
These metrics are what turn your subjective observations into concrete data. This is gold for tracking improvements over time and for showing stakeholders the real impact of your design changes. It’s no surprise that 67% of organizations now conduct formal usability testing, signaling a huge shift toward putting users at the center of the design process. You can dig into more software testing statistics and trends to see how the industry is evolving.
Keeping all this planning organized is crucial. To keep your plans, notes, and findings in one accessible place, you might want to explore some UX research repository tools. A strong foundation makes every other step of the usability testing process that much more effective.
Recruiting the Right Participants for Your Study
Let's be blunt: your usability test is only as good as the people you test it with. Getting the right participants is the make-or-break moment. It's the difference between collecting truly game-changing feedback and just wasting an afternoon. This is where you ensure the voices you’re listening to actually represent your target users, making your findings hit home.
The goal isn’t to just fill slots. It's about finding people whose real-world behaviors, motivations, and even tech frustrations mirror your actual user base. This takes a thoughtful strategy, some smart outreach, and a bit of detective work with screening.
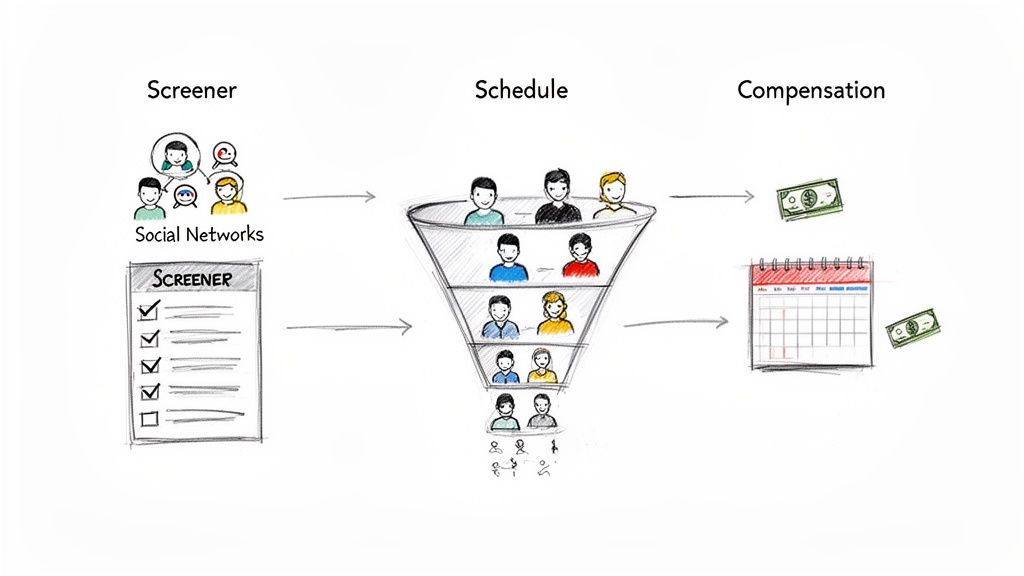
Finding Your Ideal Participants
So, where do you find these people? It really depends on who you're looking for. My advice is to never rely on a single channel. Casting a wide—but targeted—net almost always yields the best results.
Your own customer base is often the best place to start. These are people who are already invested in your product and genuinely want to see it get better. A quick email to your newsletter list, an in-app message, or a note from your customer success team can work wonders.
Don't forget social networks and online communities. LinkedIn can be great for B2B roles, while platforms like Reddit or niche Slack groups can be goldmines. Need developers? A well-worded post in a programming subreddit will get you in front of the right audience fast. For those really specific or hard-to-reach demographics, you might consider using a dedicated recruiting service. It costs more, but they handle all the heavy lifting.
The cardinal rule of recruitment is simple: go where your users are. Don't expect them to find you. Weave your recruitment efforts into the channels and communities they already hang out in. It builds immediate trust and gets you much more engaged participants.
Crafting an Effective Screener Survey
Once you've got a pool of interested people, the screener survey is your best friend. This isn't just a signup form; it's your filter. A good screener is designed to weed out the mismatches and pinpoint the people who perfectly fit your user personas.
The trick is to ask questions that reveal behavior without giving away the "right" answer. For example, instead of asking a leading question like, "Do you use project management software?", which most people will just say "yes" to, try something more open. Ask, "What tools, if any, do you use to manage your team's projects?" The difference in the quality of answers is night and day.
Your screener should always cover:
- Demographics: The basics like role, industry, or age to ensure you're matching your persona.
- Tech Savviness: A few questions to gauge their comfort level with technology and similar products.
- Behavioral Questions: These are the most important. Ask about their daily habits and workflows related to the problem you're solving.
- Logistics: Confirm their availability and that they're okay with the session being recorded.
A well-crafted screener means that every person you book time with is a quality match. This saves you an incredible amount of time and ensures the feedback you get is actually valuable.
Managing Logistics and Building Trust
Finding the right people is only half the battle. Now you have to manage the logistics professionally and start building a rapport. How you handle this sets the tone for the entire study.
Clear communication is absolutely non-negotiable. Be upfront from the very beginning about the time commitment, what the session entails, and how you'll be compensating them for their time. And yes, you should always compensate them. It shows you value their expertise and can be anything from a gift card to product credits.
Scheduling can be a real pain, so save yourself the headache and use a tool like Calendly that lets participants pick a time that works for them. When you're ready to screen, using one of the many video interview platforms for recruitment success can also make the process much smoother, especially for remote studies.
Finally, always get informed consent. Before you hit record, take a moment to explain what data you're collecting, how you'll use it, and remind them they can stop at any point. This isn't just a legal checkbox; it's a fundamental step in building the trust you need for them to be open and honest.
Writing Task Scenarios That Uncover Real User Behavior
A great usability test should feel less like an exam and more like a natural, exploratory conversation. The secret sauce is in how you write your task scenarios. Your goal isn't to quiz someone, but to create a believable context that prompts them to act just as they would in real life. That’s how you get to their unfiltered behaviors and thought processes.
This is where theory hits the road. A well-designed scenario gives a user a reason to engage, a narrative that makes the task feel important. Without that context, you’re just handing them a sterile to-do list, which almost never reveals the crucial "why" behind their actions.
From Vague Instructions to Powerful Scenarios
The biggest mistake I see teams make is writing tasks that are far too direct. They use the exact terminology from the interface, which essentially gives away the answer. This leads to a false sense of success because you’ve basically told the user exactly what to do.
Let’s break down the difference.
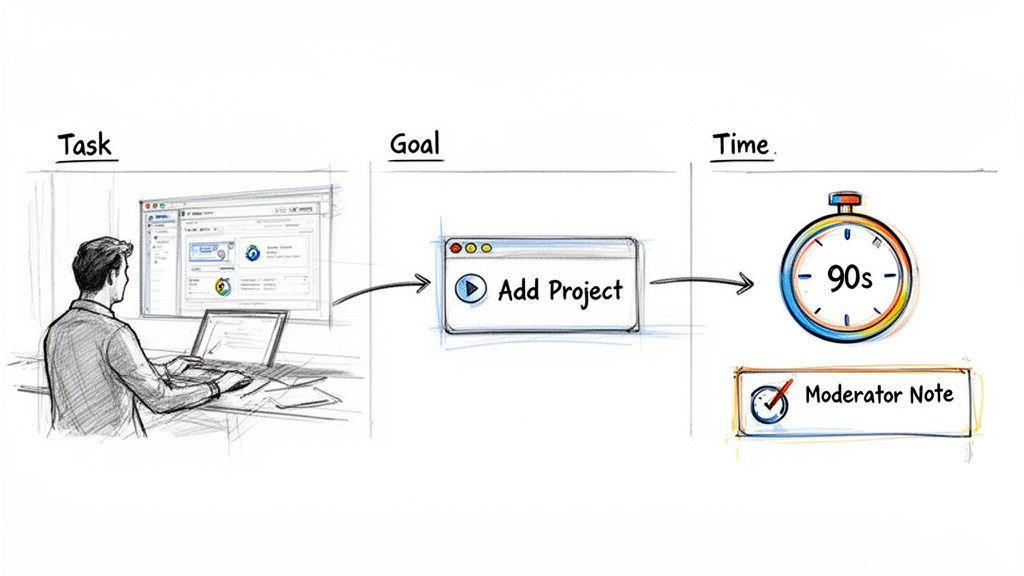
A Poorly Written Task: "Click on the 'Create New Project' button to add a project to your dashboard."
- What’s Wrong? This is a command, not a scenario. It points the user directly to the button, telling you nothing about whether they could find it on their own.
An Effectively Written Scenario: "Imagine your team is kicking off a new marketing campaign and you need a place to track all the related tasks. Show me how you would get that set up."
- What’s Different? This version gives the user a realistic context (a new campaign) and a clear goal (track tasks) without using any specific UI language. Now, they have to navigate the interface based on their own intuition.
By framing tasks this way, you learn whether your design’s logic actually matches your user’s mental model.
Mastering the Art of Neutral Questioning
As a moderator, your neutrality is everything. If you accidentally bias your participant, you risk invalidating the entire session. This means you need to scrutinize every word in your script to make sure you're not steering them toward a particular outcome.
Here are a few tips I've learned for keeping questions neutral:
- Focus on Goals, Not Steps: Instead of "Find the billing history," try framing it as a goal: "You need to pull a receipt from last month's payment for an expense report. How would you go about doing that?"
- Use Their Language: If a participant calls a feature the "picture thingy," roll with it. Don’t jump in and say, "You mean the 'Asset Library'?" Correcting them can make them feel like they're being tested, and they’ll be less likely to speak freely.
- Avoid Positive or Negative Framing: Never ask things like, "Wasn't that easy?" or "Did you find that confusing?" Instead, stick to open-ended questions: "How did that compare to what you expected?" or "Tell me about your experience with that last step."
The best moderators are masters of the poker face. Your job is to observe, not to guide. Creating a comfortable space for honest feedback—even when it's critical—is the only way to get the insights that lead to real product improvements.
To dig deeper into user motivations, it's crucial to ask the right kind of questions during the session. Different types of questions can unlock different layers of insight.
Effective Questioning Techniques for Moderated Usability Testing
| Question Type | Description | Example | Best Used For |
|---|---|---|---|
| Open-Ended | Broad questions that can't be answered with a simple "yes" or "no." | "Walk me through what you're thinking right now." | Encouraging the user to think aloud and share their thought process without leading them. |
| Probing | Follow-up questions that ask for more detail on a specific action or comment. | "You mentioned that was 'frustrating.' Can you tell me more about what felt frustrating?" | Diving deeper into a user's emotional response or unexpected behavior. |
| Clarifying | Questions to confirm your understanding of something the user said or did. | "So, just to make sure I understand, you were expecting to see a 'save' button there?" | Ensuring you've accurately captured the user's intent or expectation. |
| Comparative | Asks the user to compare their experience with a past experience or expectation. | "How does this process compare to how you normally handle this kind of task?" | Understanding how your product fits into the user's existing workflows and mental models. |
Using a mix of these questions will help you move beyond surface-level feedback and get to the core of the user experience.
Building Your Moderator Script
A moderator script is more than a list of tasks; it’s your roadmap for running a consistent and effective session. It keeps you on track, ensures every participant gets the same core experience, and helps you build rapport right from the start.
Direct interaction is central to most usability research. In fact, studies show one-on-one interviews and usability tests are used by 88% and 80% of researchers, respectively, making them the most common ways to get user feedback. You can explore more usability testing benchmarks and trends to see how different methods are used in the industry. This just goes to show how critical a well-structured, moderated session really is.
A solid script should always include these four parts:
- The Introduction (Building Rapport): Welcome the participant, thank them for their time, and set the stage. The most important thing here is to reassure them that you're testing the product, not them, and that there are no right or wrong answers.
- Pre-Test Questions (Gathering Context): Before diving in, ask a few questions to understand their background and experience with similar tools. This information is gold for contextualizing their feedback later on.
- The Task Scenarios (The Main Event): This is the core of the test, where you’ll present your carefully crafted scenarios and observe the user as they work through them.
- Post-Test Questions (The Wrap-Up): Once the tasks are done, ask for their overall impressions. This is a great time to zoom out and ask about their general experience, what they liked or disliked most, and any final thoughts they have.
Moderating Sessions Like a Pro: In-Person and Remotely
This is where all your careful planning comes to life. Whether you're sitting across from someone in a lab or connecting with them across the country on a video call, your ability to moderate the session is what makes or breaks the entire test.
The goal is to make people feel comfortable enough to give you their unfiltered, honest feedback. A great moderator acts more like a friendly guide than a formal interviewer, gently steering the conversation to uncover genuine user behavior. Let's get into the practical side of running sessions that deliver the goods.
The Right Tools for the Job
Before you even think about starting a session, you need to get your setup right. The tools you choose will depend entirely on whether you're running the test in person or remotely.
- In-Person Setups: Think of a classic usability lab. You'll need a quiet room, good cameras to capture the user's screen and their reactions, and ideally, a one-way mirror so your team can watch without making the participant nervous.
- Remote Platforms: Here, your success hinges on solid tech. You'll lean on screen-sharing tools like Zoom or Lookback, a stable internet connection (for both you and the participant), and a way to reliably record the entire session for later analysis.
- Hybrid Approaches: Sometimes, the best insights come from mixing it up. You might have a user interact with a physical prototype in a lab while your product manager observes remotely, bringing in different perspectives.
A core principle to remember is neutral facilitation. Your job is to create a space for the user to think, not to lead them to the answers you want to hear.
Making Participants Feel at Ease
Building rapport is the first order of business. Start with a warm, genuine greeting and keep the introduction short and sweet. The most important thing you can do is set clear expectations and immediately lower the stakes.
I always make a point to say, "There are no right or wrong answers here. We're testing the product, not you." This little phrase works wonders to reduce anxiety and encourages people to be more open.
As you move into the actual tasks, gently remind them to "think aloud." If they go quiet, a simple, non-leading prompt like, “What’s going through your mind right now?” is much better than a pointed question like, “Why did you click that?” This keeps the feedback centered on their organic thought process.
In-Person vs. Remote: What's the Difference?
Running a session in person feels very different from running one remotely. You have to adapt your style to the format.
| Aspect | In-Person | Remote |
|---|---|---|
| Observation Quality | You can see everything—subtle gestures, facial expressions, body language. | You're at the mercy of camera angles and connection quality. |
| Technical Reliability | You control the hardware and environment, so fewer things go wrong. | A participant's spotty Wi-Fi can derail an entire session. |
| Rapport Building | Easier to build a connection with eye contact and physical presence. | You have to work harder, relying on your tone and clear verbal cues. |
| Setup Time | Can take longer to prep a physical room and equipment. | Generally faster; you can jump into a standardized virtual room. |
When you're in the same room, you can pick up on a hesitant sigh or a subtle frown that might not come through on a webcam. Remotely, your voice becomes your most powerful tool. You have to be crystal clear and incredibly attentive to the verbal cues you do get.
How to Probe Without Leading
This is the art of moderation. You need to dig deeper for insights without planting ideas in the participant's head.
Here are a few guidelines I always stick to:
- Focus on the objective, not the UI. Your tasks should mirror what a real user is trying to accomplish.
- Ask open-ended questions. Instead of "Was that easy?" ask, "What did you expect to happen when you clicked that?"
- Clarify without suggesting. If a user does something unexpected, say, "Can you walk me through what you just did?"
As one of my mentors, a UX veteran, always said, “Moderation is about listening twice as much as you speak.”
It’s so tempting to jump in and help when a user gets stuck or to celebrate when they easily complete a task. Resist that urge. Your neutrality is what protects the integrity of your findings.
The demand for these skills is only growing. The User Experience Research Software market was valued at USD 27.86 billion in 2024 and is projected to hit an incredible USD 171.45 billion by 2032. This explosive growth is creating more and more tools—both moderated and unmoderated—to help us understand our users. You can read more about the UX Research Software market growth to see where things are headed.
And if you need some inspiration for what to ask, our guide on UX research interview questions is packed with great prompts and frameworks.
Key Best Practices for Moderation
- Stay Neutral: Watch your tone and word choice. Avoid sounds or phrases ("great!", "perfect!") that signal approval or disapproval.
- Listen Actively: Don't just wait for your turn to talk. Note down interesting phrases or moments of hesitation and circle back to them later.
- Be Adaptive: Technical glitches will happen. Stay calm, troubleshoot patiently, and keep the session moving forward as best you can.
- Capture Context: Don't let valuable insights slip away. Use a tool like FeatureBot’s Free plan to quickly log session details and user feedback on the fly, making analysis much easier later.
A Real-World Moderation Scenario
On a recent fintech project, we ran six sessions—three in our office and three remotely. We quickly noticed a pattern with the in-person testers: they all hesitated at a specific permission prompt. Before the remote sessions, we added a quick heads-up about it in our introduction, and the hesitation vanished.
From that one study, we made a few key adjustments:
- We started asking testers to define any industry jargon in their own words.
- We added visual "loading" cues to the interface for slow-to-respond actions.
- For remote tests, we included backup audio instructions in case of network lag.
By combining the rich, non-verbal feedback from the in-person tests with the real-world tech constraints we saw in the remote sessions, the team was able to slash onboarding errors by 40%. It’s a perfect example of how adapting your moderation to the format leads to better design decisions.
Mastering moderation doesn't happen overnight. It takes practice, reflection, and a genuine curiosity about how people think.
Turning Raw Feedback into Actionable Insights
So, you've wrapped up your usability sessions. Now you’re sitting on a pile of recordings, pages of notes, and a bunch of user quotes. This is the gold, but right now, it's just raw ore. The real work begins now: turning that feedback into a clear, prioritized plan that will actually make your product better.
The goal here isn't to write a 50-page report that no one will read. It’s about pulling out the most important themes and presenting them in a way that gets the team excited to make changes. This is where you connect the dots between what you learned from users and what the development team builds next.
Synthesizing Findings with Affinity Mapping
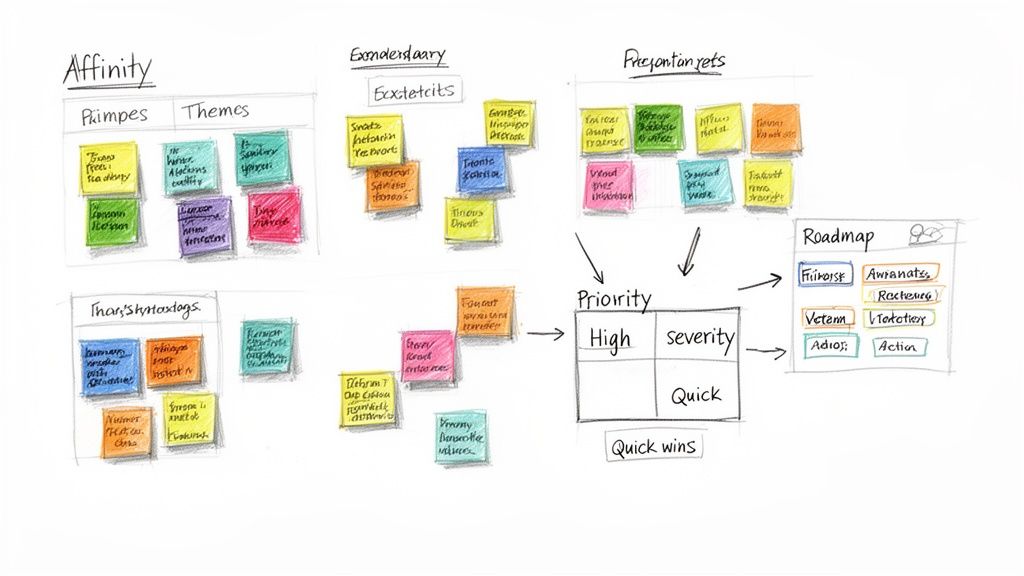
One of my go-to methods for making sense of all this qualitative data is affinity mapping. It's basically organized chaos. You grab every single observation, quote, or pain point, jot each one down on a sticky note, and start grouping them with your team.
You’ll start to see patterns emerge. For instance, you might have a few different notes like, "couldn't find the export button," "was confused about how to download my report," and a direct quote from a user saying, "Where do I get this data out?" All of those would naturally cluster under a theme you might call "Difficulty Exporting Data."
What I love about this bottom-up approach is that it lets the insights reveal themselves, rather than you trying to shoehorn observations into categories you already had in mind. It's a fantastic, collaborative way for the whole team to see the big picture together.
To get the most out of this stage, it helps to be comfortable with a few different analysis techniques. If you're looking to build up your skills, there are some great guides on mastering qualitative research analysis methods that can really solidify your process.
The point of synthesis isn't just to make a list of problems. It’s about finding the story behind them. Affinity mapping helps you see how seemingly separate struggles are often connected to a single root cause.
Prioritizing Issues by Severity and Frequency
Let's be real: not all usability issues are created equal. A typo on an obscure settings page is an annoyance. A bug that blocks someone from checking out? That's a five-alarm fire. You need a straightforward way to sort the minor tweaks from the major roadblocks.
A simple but incredibly effective way to do this is to plot each issue on a matrix based on two things:
- Frequency: How many people hit this wall? Was it a one-off thing, or did every single participant get stuck here?
- Severity: How badly did this derail the user? Was it a small speed bump, or did it completely prevent them from finishing their task?
This visualization makes your priorities crystal clear. Anything that’s high-frequency and high-severity is what you need to tackle first. The low-frequency, low-severity stuff can comfortably live in the backlog for a rainy day.
Bridging the Gap Between Research and Development
All this work is for nothing if it doesn't translate into actual changes in the product. The final, critical step is turning your prioritized list into recommendations that your design and dev teams can run with. The key is to be clear, concise, and solution-focused.
For every major issue you surfaced, frame your report like this:
- The Finding: Start with a simple, one-sentence summary of the problem.
- Supporting Evidence: This is where you bring the data to life. Use direct quotes or, even better, short video clips of users struggling. It's so much more powerful than just describing what happened.
- The Recommendation: Offer a specific, actionable suggestion for a fix.
For example, instead of a vague note like "Users were confused," you get specific: "Four out of five users could not locate the save button after editing their profile." Your recommendation then becomes equally specific: "Relocate the save button to the top of the form and increase its color contrast to make it more visible."
This format gives your team everything they need: they understand the problem, they believe it's real (because they can see the evidence), and they know exactly what to do next. For teams that want to dive deeper into this process, our guide on https://featurebot.com/blog/qualitative-data-analysis-techniques offers additional frameworks and examples.
Of course, keeping all this feedback organized and tracking it to completion is its own challenge. Some teams get by with spreadsheets, but specialized tools can make a huge difference. For example, with FeatureBot, you can use our Free plan to log session details and user comments in context, making sure no valuable insight gets lost in the shuffle. It's all about making sure your hard-earned insights actually drive real product change.
Got Questions About Usability Testing? You're Not Alone.
When you're first getting started with usability testing, a few questions always seem to come up. It's totally normal. Nailing down the answers to these fundamentals will help you avoid a lot of the common traps and make your research way more effective.
Let's walk through some of the most common questions I hear from teams.
How Many People Do I Actually Need to Test With?
This is the big one, and the answer might surprise you. For most studies where you're looking for qualitative insights, you only need five participants.
That’s not a number pulled out of thin air. Research going back decades shows that with just five people from a specific user group, you'll typically uncover around 85% of the most glaring usability problems. After that fifth person, you'll mostly just see the same issues over and over again. It's a classic case of diminishing returns.
Of course, this isn't a hard-and-fast rule. If you have very distinct user groups—think "buyers" vs. "sellers" on an e-commerce site—you'll want to test three to five people from each of those groups. And if you're doing quantitative testing to get statistically significant data, you’ll need a much bigger sample size, usually 20 or more.
Moderated vs. Unmoderated: Which One Should I Choose?
The real difference here boils down to whether a live person is guiding the session.
Moderated Testing: This is when a researcher sits with the participant (in person or remotely) and guides them through the tasks. It’s fantastic for digging into the "why" behind their actions with follow-up questions. I find it’s best for testing complex workflows or for early-stage research where you're still exploring ideas.
Unmoderated Testing: Here, participants are on their own. They follow a set of instructions and use a tool that records their screen and voice. It's much faster and easier to scale, which makes it perfect for validating a specific flow or getting quick feedback from a large number of people across different locations.
So, what’s your goal? If you need rich, deep insights, go with moderated. If you need to validate something quickly with a broader audience, unmoderated is your friend.
How Can I Measure How Satisfied Users Are?
Watching what people do is essential, but you also need to capture what they think about the experience. The best way to do this is with a standardized questionnaire after the test. The most common one is the System Usability Scale (SUS).
The SUS gives you a single, reliable score that tells you how usable your product feels to people. It’s been used in thousands of studies, so we have a solid benchmark for what a "good" score looks like.
For context, the industry average SUS score is 68. Similarly, the Accessibility Usability Scale (AUS) has an average score of 65. These numbers give you a valuable yardstick. You can learn more about how these scores compare from this report on usability and accessibility benchmarks.
A score over 68 is generally a good sign—your user experience is above average. If you're scoring below that, it’s a clear signal that there are some serious usability hurdles you need to address.
How Do I Get My Stakeholders to Buy In?
This is less about research and more about sales. Don't frame usability testing as a cost; frame it as a way to reduce risk and save money.
Talk about the return on investment (ROI). Explain that finding and fixing a major usability problem before it goes live saves a massive amount of developer time and support costs later on. The cost of a few hours of testing is a drop in the bucket compared to the cost of rebuilding a feature after launch.
Tie your pitch to business goals they already care about. For example, instead of saying "we need to test the checkout," say, "Improving this checkout flow could boost our conversion rate by X%."
Honestly, the most powerful tool in your arsenal is a highlight reel. A two-minute video clip showing a real customer getting frustrated with your product is more persuasive than any 50-page report you could ever write.
Gathering feedback is just the start. The real magic happens when you turn those insights into action. FeatureBot is an AI-powered platform that helps you capture, organize, and prioritize what you learn from users. You can capture feedback right where it happens, automatically group similar requests, and instantly see which new features will actually move the needle on your revenue. Start making smarter product decisions today. Find out more at https://featurebot.com.
Ready to capture better feedback?
FeatureBot helps you collect, organize, and prioritize user feedback with AI-powered conversations.
Get Started Free